Day 1...

Day 1...

Sunday, February 10, 2013

Trim Painting

While I was working on the front fascia eyebrow repair today, I prepped and painted 4 total pieces of trim (the 2 grill inserts just behind each door, and the 2 air-intake grills near the rear fascia.

Here is what the grill inserts looked like before I started.


Notice how the sun faded the fiberglass and made it look more grey than black. The air-intake grills were in similar condition.


I researched the best approach to refinishing these pieces. All DeLorean sources said to paint these trim pieces on the car. My other option was to remove both quarter panels and break the retaining clips that hold these on, order replacements and reverse procedure for installation. So I opted for trying out painting them on the car. First I sanded with 150 grit, then 300, then some fine steel wool. Then I used the alcohol-based paint prep liquid on a towel and wiped down all the surfaces. Then 2 coats of primer followed by 2-3 coats of flat black trim paint. I think it turned out pretty nice for a DIY garage job.


This was a productive Sunday.
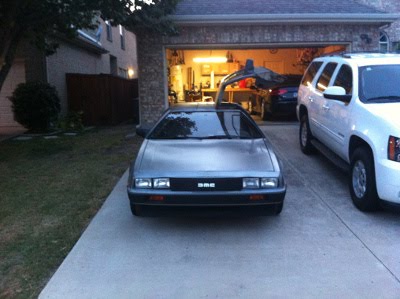

Front Fascia Eyebrow Repair

Today I tackled the repair of the "eyebrows" on the front fascia. Just a heads-up --> this thread is going to be photo intensive.

The first pic was taken by the PO when the car was still in Phoenix. The next two photos I took today before I started the repairs. Notice the eyebrow warping caused by the sun. This is a common problem with DeLoreans that have spent any significant time in direct sunlight. 


I used a PDF "how-to" created by another DeLorean owner that I found on the dmctalk forum as a guideline to this task. 


Here I have the driver-side reformation in progress. Using a heat gun, and a little patience, I was able to reform the contour back to within 90% of how it would have looked from the factory.


I repeated the process for the passenger-side and then, using a longer & skinnier board, clamped down both sides. Just prior to doing this I used 2 aluminum strips cut to 15" long, 3/4" wide, and 1/8" thick along with some 3M heavy duty windshield glue to reinforce the reformed fascia lip on both sides.

I'm going to leave this as is overnight to allow the windshield glue to dry and cure. I'll update with more pics after I put the headlamps back in for a true before & after comparison.

The entire process took about 5 hours. 

Sunday, February 3, 2013

Marker Lights Part II

As a follow-up to one of my previous posts (Marker Lights Part I on October 13, 2012), I replaced 3 lenses, bulbs, and sockets --> both front amber lights + the driver-side rear. This picture doesn't do it much justice.


Also - the car started right up after sitting for several hours since replacing the fuel accumulator earlier today. I still need to install and connect the passenger door switch to get those door lights working too.

Fuel Accumulator

Since I've had the car, it has had a hot start problem. You would have to crank on it pretty hard for a long time to get it started only when it had been run up to temp from anywhere between 5 mins and 5 hours.

It seemed to get worse last fall so I finally called the guys down at DMCH. James told me 90% of the time the hot start problem is caused by a failing fuel accumulator. The accumulator is part of the Bosch K-Jet fuel injection system. It holds the "rest pressure" so that the car can start w/o much fuss after the motor has been recently run. It sits between the fuel pump and the fuel filter, which is right behind the fuel injection manifold.

It is in the middle of the frame in a little cutout section for access. In order to get to it, you either need a lift or jack up the car and put it as high as you can get using jack stands. Since I did this job in my garage, the latter was my only option. The entire replacement job took maybe 2 hours. After I replaced it I started the car to check for leaks. I had a significant dripping leak so I crawled back underneath the car and tightened the offending fuel line. Then I started the car again and checked to make sure there were no more leaks.

After that I got the engine up to temperature and then shut it off. I waited 5 minutes and started it again without and trouble. Then I waited about an hour and tried it again. It fired right up. I'll continue to monitor it but I think the issue has been resolved.

Here's a picture of the replacement and the original. The original looks to be significantly larger than the replacement, but it all connected just fine without issue. The kit came with 2 hoses and 4 hose clamps. I replaced them too in the process.