
Day 1...

Thursday, May 23, 2013
Transmission Selector Trim

Back to the fun stuff... I picked up this kit from DMOCO. I really like the way it turned out. It came with a new emblem for the shifter itself and a stainless trim piece with an etched logo at the bottom. Installation was 15 minutes tops.

Monday, May 20, 2013
Restoration Calculation
If you've been following this restoration blog, you'll know that my car is a rolling restoration project. This is NOT a frame-off, complete engine & transmission rebuild type of project (and fingers crossed it stays that way!).
That said, I've been working on a spreadsheet essentially as long as I've owned the car. On this sheet I've been adding to an ever-growing list of parts as I identify things needed. Since this sheet is dynamic in nature, the calculations aren't the gospel but should give a good idea as to where I am at least in terms of purchasing the parts needed to get this car where I want it.
Now a couple of things to mention before I proceed... First, I have not included any dash repair costs, mostly because I don't know how I will proceed (this includes the binnacle that houses the instrument cluster). Second, I don't have any AC repair costs included. I haven't yet determined what, if anything needs to be replaced. I've only found 1 disconnected vacuum hose thus far. More testing will have to be done at a later time.
My running total on estimated parts costs for the entire project is: $4,373.09. To date, I've invested $952.75. These costs do not include shipping or taxes where applicable. That means as the car sits today, it should be approximately 21.79% restored. This to be more precise:

I'm getting ready to drop another $350 in rebuilding the brake system this month. The car already has a relatively new master cylinder so I'm not planning on doing anything with that, yet.
The brake work will put me at 29.79%.
I've owned the car for roughly 297 days.
At my current pace, the car will take another 701 days to complete (provided I don't add to the list, which I likely will).
Overall, the entire project will take 998 days. (Legend: 3 years = 1095 days)
Overall I'm really pleased with these numbers. I had always held a 5 year vision on getting this car where I wanted it. Who knows, this list may grow and turn out to be much more. And those who work on cars understand that there's always some maintenance or repair to be made. It will never be truly "finished".

Now typically I wouldn't disclose these types of financials as I hold these matters private; however, I'd like to share this so that anyone with genuine interest knows what it takes to "spiff" up one of these cars, at least in general. There are certainly cheaper, faster, and more modern cars to restore out there, but I challenge any of those against the attention that a DeLorean generally attracts.
Also please take into account that this only shows the progress of PARTS PURCHASED. I still have to do the actual work, which takes considerable time and effort. Almost 1 year into this ownership and project and I'm not burned out and I'm pacing myself with the project.
That said, I've been working on a spreadsheet essentially as long as I've owned the car. On this sheet I've been adding to an ever-growing list of parts as I identify things needed. Since this sheet is dynamic in nature, the calculations aren't the gospel but should give a good idea as to where I am at least in terms of purchasing the parts needed to get this car where I want it.
Now a couple of things to mention before I proceed... First, I have not included any dash repair costs, mostly because I don't know how I will proceed (this includes the binnacle that houses the instrument cluster). Second, I don't have any AC repair costs included. I haven't yet determined what, if anything needs to be replaced. I've only found 1 disconnected vacuum hose thus far. More testing will have to be done at a later time.
My running total on estimated parts costs for the entire project is: $4,373.09. To date, I've invested $952.75. These costs do not include shipping or taxes where applicable. That means as the car sits today, it should be approximately 21.79% restored. This to be more precise:
I'm getting ready to drop another $350 in rebuilding the brake system this month. The car already has a relatively new master cylinder so I'm not planning on doing anything with that, yet.
The brake work will put me at 29.79%.
I've owned the car for roughly 297 days.
At my current pace, the car will take another 701 days to complete (provided I don't add to the list, which I likely will).
Overall, the entire project will take 998 days. (Legend: 3 years = 1095 days)
Overall I'm really pleased with these numbers. I had always held a 5 year vision on getting this car where I wanted it. Who knows, this list may grow and turn out to be much more. And those who work on cars understand that there's always some maintenance or repair to be made. It will never be truly "finished".
Now typically I wouldn't disclose these types of financials as I hold these matters private; however, I'd like to share this so that anyone with genuine interest knows what it takes to "spiff" up one of these cars, at least in general. There are certainly cheaper, faster, and more modern cars to restore out there, but I challenge any of those against the attention that a DeLorean generally attracts.
Also please take into account that this only shows the progress of PARTS PURCHASED. I still have to do the actual work, which takes considerable time and effort. Almost 1 year into this ownership and project and I'm not burned out and I'm pacing myself with the project.
Monday, April 29, 2013
Rear Fascia Work
I haven't been able to get as much done lately. I did start on the rear fascia yesterday.


I also put primed and put on the first coat of the satin black on the rear louvre.

More to come soon...
Saturday, March 16, 2013
Fantastic Saturday
The weather here was awesome today. Upper 70s with a stout breeze. I had a furniture delivery around lunchtime so I used the morning to sweep out the garage and pull the car out on the driveway. I haven't had it out of the garage since Christmas!
_2013_0316.JPG)
_2013_0316.JPG)
Last night I took the driver-side headliner off. These cars are known for their "cave-paintings" --> writings and drawings on hidden areas of the car's stainless undersides. I found "Bay City Rollers" written on mine, which apparently were a Scottish pop band from the 70s & 80s.

_2013_0316.JPG)
_2013_0316.JPG)
Last night I took the driver-side headliner off. These cars are known for their "cave-paintings" --> writings and drawings on hidden areas of the car's stainless undersides. I found "Bay City Rollers" written on mine, which apparently were a Scottish pop band from the 70s & 80s.

Friday, March 8, 2013
Front Fascia Completed
I'm finally getting around to posting some pics of the most recent work I've done on the car (since my last post).


This was after I sanded and prepped the front fascia for paint and put on 2-3 coats of filler primer. I had used 80-grit sandpaper and was expecting the filler primer to hide the coarse sanding scratches. Unfortunately it didn't work as well as I'd hoped and there are several spots were you can see sub-painted surface scratches.

This was after I put the headlamps back in last night. I still need to adjust the headlamps. It illustrates the overall success of the eyebrow fix and the 6-7 new coats of metallic silver/gray paint that I put on it. I'm not 100% pleased with the paint but its much better than it was before and it will do for now. I may redo this at some point down the road for perfection.


These 2 pics were taken after I installed new hood and door struts. The old hood (trunk area) struts were completely worn out and wouldn't hold the hood open. The door struts were on their last leg, especially the driver side. I noticed when I removed the old ones that they had been replaced in 2004. I guess 10 yrs is about all the seals can take. The doors weigh 80 pounds you really notice this when changing the door struts. The set I bought also came w/ struts for the rear louvre. I haven't installed those yet as I'm still working on that part.
Speaking of the rear louvre; I have made additional progress on that. Still more prep work to complete before paint. I never thought that damned thing would take so long. Between Shaun and myself, we probably have 20-30 hours combined in that part alone.
I hope to make more progress this weekend, provided I can find the time.
Sunday, February 10, 2013
Trim Painting
While I was working on the front fascia eyebrow repair today, I prepped and painted 4 total pieces of trim (the 2 grill inserts just behind each door, and the 2 air-intake grills near the rear fascia.
Here is what the grill inserts looked like before I started.
_2013_0210.JPG)
Notice how the sun faded the fiberglass and made it look more grey than black. The air-intake grills were in similar condition.
_2013_0210.JPG)
_2013_0210.JPG)
_2013_0210.JPG)
I researched the best approach to refinishing these pieces. All DeLorean sources said to paint these trim pieces on the car. My other option was to remove both quarter panels and break the retaining clips that hold these on, order replacements and reverse procedure for installation. So I opted for trying out painting them on the car. First I sanded with 150 grit, then 300, then some fine steel wool. Then I used the alcohol-based paint prep liquid on a towel and wiped down all the surfaces. Then 2 coats of primer followed by 2-3 coats of flat black trim paint. I think it turned out pretty nice for a DIY garage job.
_2013_0210.JPG)
_2013_0210.JPG)
This was a productive Sunday.
Here is what the grill inserts looked like before I started.
_2013_0210.JPG)
Notice how the sun faded the fiberglass and made it look more grey than black. The air-intake grills were in similar condition.
_2013_0210.JPG)
_2013_0210.JPG)
_2013_0210.JPG)
I researched the best approach to refinishing these pieces. All DeLorean sources said to paint these trim pieces on the car. My other option was to remove both quarter panels and break the retaining clips that hold these on, order replacements and reverse procedure for installation. So I opted for trying out painting them on the car. First I sanded with 150 grit, then 300, then some fine steel wool. Then I used the alcohol-based paint prep liquid on a towel and wiped down all the surfaces. Then 2 coats of primer followed by 2-3 coats of flat black trim paint. I think it turned out pretty nice for a DIY garage job.
_2013_0210.JPG)
_2013_0210.JPG)
This was a productive Sunday.
Front Fascia Eyebrow Repair
Today I tackled the repair of the "eyebrows" on the front fascia. Just a heads-up --> this thread is going to be photo intensive.
The first pic was taken by the PO when the car was still in Phoenix. The next two photos I took today before I started the repairs. Notice the eyebrow warping caused by the sun. This is a common problem with DeLoreans that have spent any significant time in direct sunlight.


_2013_0210.JPG)
Here I have the driver-side reformation in progress. Using a heat gun, and a little patience, I was able to reform the contour back to within 90% of how it would have looked from the factory.
_2013_0210.JPG)
I repeated the process for the passenger-side and then, using a longer & skinnier board, clamped down both sides. Just prior to doing this I used 2 aluminum strips cut to 15" long, 3/4" wide, and 1/8" thick along with some 3M heavy duty windshield glue to reinforce the reformed fascia lip on both sides.
I'm going to leave this as is overnight to allow the windshield glue to dry and cure. I'll update with more pics after I put the headlamps back in for a true before & after comparison.
The entire process took about 5 hours.
The first pic was taken by the PO when the car was still in Phoenix. The next two photos I took today before I started the repairs. Notice the eyebrow warping caused by the sun. This is a common problem with DeLoreans that have spent any significant time in direct sunlight.


I used a PDF "how-to" created by another DeLorean owner that I found on the dmctalk forum as a guideline to this task.
_2013_0210.JPG)
Here I have the driver-side reformation in progress. Using a heat gun, and a little patience, I was able to reform the contour back to within 90% of how it would have looked from the factory.
_2013_0210.JPG)
I repeated the process for the passenger-side and then, using a longer & skinnier board, clamped down both sides. Just prior to doing this I used 2 aluminum strips cut to 15" long, 3/4" wide, and 1/8" thick along with some 3M heavy duty windshield glue to reinforce the reformed fascia lip on both sides.
I'm going to leave this as is overnight to allow the windshield glue to dry and cure. I'll update with more pics after I put the headlamps back in for a true before & after comparison.
The entire process took about 5 hours.
Sunday, February 3, 2013
Marker Lights Part II
As a follow-up to one of my previous posts (Marker Lights Part I on October 13, 2012), I replaced 3 lenses, bulbs, and sockets --> both front amber lights + the driver-side rear. This picture doesn't do it much justice.
_2013_0203.JPG)
Also - the car started right up after sitting for several hours since replacing the fuel accumulator earlier today. I still need to install and connect the passenger door switch to get those door lights working too.
_2013_0203.JPG)
Also - the car started right up after sitting for several hours since replacing the fuel accumulator earlier today. I still need to install and connect the passenger door switch to get those door lights working too.
Fuel Accumulator
Since I've had the car, it has had a hot start problem. You would have to crank on it pretty hard for a long time to get it started only when it had been run up to temp from anywhere between 5 mins and 5 hours.
It seemed to get worse last fall so I finally called the guys down at DMCH. James told me 90% of the time the hot start problem is caused by a failing fuel accumulator. The accumulator is part of the Bosch K-Jet fuel injection system. It holds the "rest pressure" so that the car can start w/o much fuss after the motor has been recently run. It sits between the fuel pump and the fuel filter, which is right behind the fuel injection manifold.
It is in the middle of the frame in a little cutout section for access. In order to get to it, you either need a lift or jack up the car and put it as high as you can get using jack stands. Since I did this job in my garage, the latter was my only option. The entire replacement job took maybe 2 hours. After I replaced it I started the car to check for leaks. I had a significant dripping leak so I crawled back underneath the car and tightened the offending fuel line. Then I started the car again and checked to make sure there were no more leaks.
After that I got the engine up to temperature and then shut it off. I waited 5 minutes and started it again without and trouble. Then I waited about an hour and tried it again. It fired right up. I'll continue to monitor it but I think the issue has been resolved.
Here's a picture of the replacement and the original. The original looks to be significantly larger than the replacement, but it all connected just fine without issue. The kit came with 2 hoses and 4 hose clamps. I replaced them too in the process.
_2013_0203.JPG)
_2013_0203.JPG)
It seemed to get worse last fall so I finally called the guys down at DMCH. James told me 90% of the time the hot start problem is caused by a failing fuel accumulator. The accumulator is part of the Bosch K-Jet fuel injection system. It holds the "rest pressure" so that the car can start w/o much fuss after the motor has been recently run. It sits between the fuel pump and the fuel filter, which is right behind the fuel injection manifold.
It is in the middle of the frame in a little cutout section for access. In order to get to it, you either need a lift or jack up the car and put it as high as you can get using jack stands. Since I did this job in my garage, the latter was my only option. The entire replacement job took maybe 2 hours. After I replaced it I started the car to check for leaks. I had a significant dripping leak so I crawled back underneath the car and tightened the offending fuel line. Then I started the car again and checked to make sure there were no more leaks.
After that I got the engine up to temperature and then shut it off. I waited 5 minutes and started it again without and trouble. Then I waited about an hour and tried it again. It fired right up. I'll continue to monitor it but I think the issue has been resolved.
Here's a picture of the replacement and the original. The original looks to be significantly larger than the replacement, but it all connected just fine without issue. The kit came with 2 hoses and 4 hose clamps. I replaced them too in the process.
_2013_0203.JPG)
_2013_0203.JPG)
Sunday, January 27, 2013
Lights & Switches
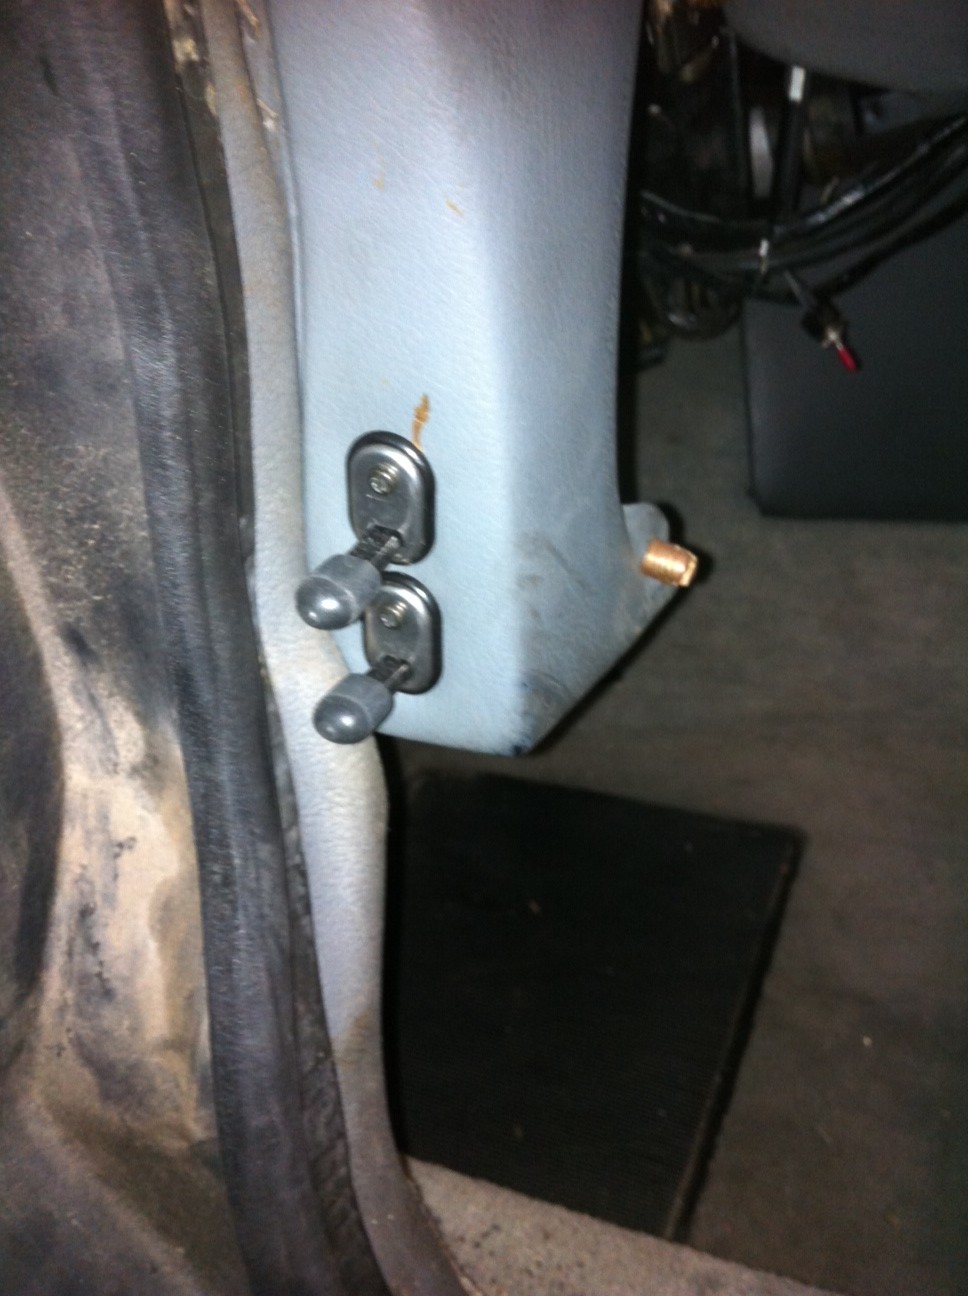
I was down in Houston again last weekend and stopped by DMC to pick up a few parts on my list. I'm in need of a fuel accumilator in hopes it will resolve a hot-start issue I'm experiencing. Unfortunately that part is on backorder. So I picked up a handful of parts.
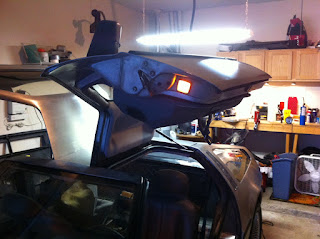


- 3 marker light lenses. (2 amber for the front and 1 red for the left rear)
- 3 marker light sockets
- 3 door switches
- Hardware for 3 door switches (nuts, washers, machine screws)
- Accelerator pedal pad


Monday, December 24, 2012
.jpg)
.jpg)


Sunday, December 23, 2012
Night Lights
Forgot to post these pics I took over Thanksgiving. Thought the night lighting looked cool. Will look even better when I get the door lights reconnected.
_2012_1121.JPG)
_2012_1121.JPG)
_2012_1121.JPG)
_2012_1121.JPG)
Subscribe to:
Posts (Atom)