This is going to be a brief post followed by a more lengthy post in Part II. Hopefully there will be no Part III.
As of now, I have started my initial attempts to drain the tank. I couldn't get a good vacuum to pull the fuel out of the tank so today I ordered a siphon pump, a new 5 gallon gas can, and a box of rubber gloves. I'll pick up some acetone this weekend.
Once the old gas comes out I'll scrub the tank several times over and take a few pics along the way. My goal is to get some internal pics as well. The tank is synthetic so hopefully it will scrub up nicely without any surprises.
Here is a pic of the original pickup screen that sits in the bottom of the baffle at the bottom of the tank. Next to it is a new replacement part from DMCH. I think this speaks for itself.
Day 1...
Friday, September 19, 2014
Sunday, September 7, 2014
Replacement parts arrived
I ordered replacement parts for the fuel pump/tank area. The new fuel pump boot arrived with a large crack in the ring. I'll be sending this back for an exchange this week.
Yesterday was also the Italian Car Fest in Grapevine. I had the 308 GTSi at the house this weekend and snapped a pic of it in the garage next to the DeLorean.
Monday, September 1, 2014
Fuel Pump Surprise
I decided to drain the fuel tank of the old gas by jumping the RPM relay (like I did during my previous fuel flow tests). I took loose the rubber lines from the metal barbs on the metal lines next to the pump. The return line was a real pain justifying the need to get out the razor knife to get it free.
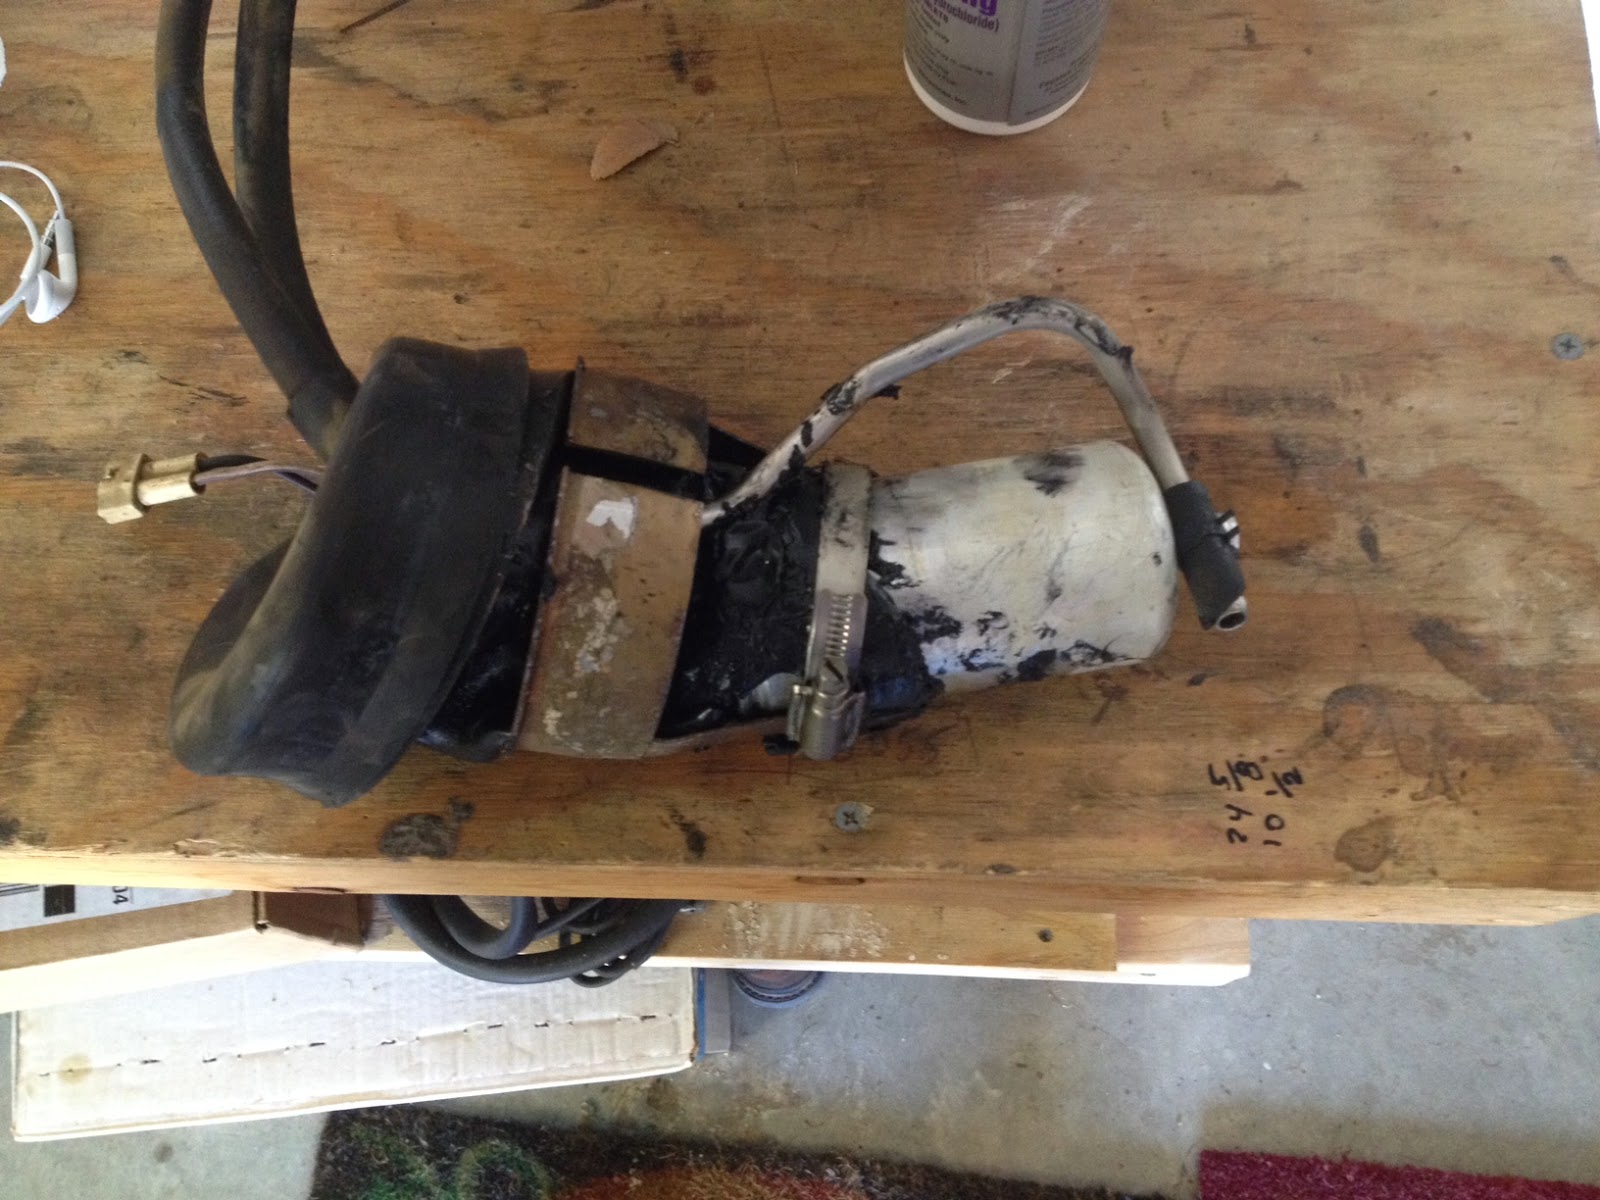
Before jumping the relay I decided to inspect the fuel pump inner rubber boot, knowing I had a faint fuel smell in this area prior. This is the little surprise I found.
What fun! The return line rubber hose in the tank ripped like a piece of bread when I tried to pull it off. The main line at the bottom of the pump seemed OK though. I am now in the process of putting together a parts list for these rubber parts that have become perished.
I put the rubber external boot back over the tank lid with a piece of duct tape over the two hose inlets to keep the fumes from escaping.
One step forward, two steps back. That first drive since the engine fire seems a little more distant after this find. We'll get there though.
Sunday, August 17, 2014
Status Update
I still have 2 fuel injectors that are failing flow tests. Today I used my air compressor to blow them out. The two problematic injectors look to have some rust/oil/crud build-up inside them. I decided to soak them in the bath for a few more days as one last resort. If they still don't work at that point, I'll replace them.
I also inspected the fuel tank area where the pump and sender unit reside. There was a decent raw gasoline smell in this area so something isn't sealed-up properly. I'm going to rig-up a long fuel line and a bucket and jump the RPM relay to empty the gas tank of the old gasoline. I'm also going to replace the rubber fuel line sections and see if I can locate the source of the smell and fix that.
The sender unit says "delorean.com" so this has been replaced at least once since new.
A previous owner at some point installed a speaker in the storage compartment behind the driver seat. I took out the custom fabrication and put the factory door back on there. Looks much better!
I also inspected the fuel tank area where the pump and sender unit reside. There was a decent raw gasoline smell in this area so something isn't sealed-up properly. I'm going to rig-up a long fuel line and a bucket and jump the RPM relay to empty the gas tank of the old gasoline. I'm also going to replace the rubber fuel line sections and see if I can locate the source of the smell and fix that.
The sender unit says "delorean.com" so this has been replaced at least once since new.
A previous owner at some point installed a speaker in the storage compartment behind the driver seat. I took out the custom fabrication and put the factory door back on there. Looks much better!
Monday, July 7, 2014
Cleaning the Fuel Injectors Part II
The first attempt was too weak and I didn't notice enough improvement via physical inspection to warrant reconnecting everything just to have the same results prior.
That said I broke down and ordered the heavy duty cleaner in the gallon bucket with the little plastic bucket that sits inside the "bath". I put the injectors in and let them soak from Wednesday through yesterday afternoon (4-ish days).
I removed the injectors from the bath last night and they look better than they ever have before, probably since they were new. In the spirit of the holiday weekend, I included a festive element to the photos.
That said I broke down and ordered the heavy duty cleaner in the gallon bucket with the little plastic bucket that sits inside the "bath". I put the injectors in and let them soak from Wednesday through yesterday afternoon (4-ish days).
I removed the injectors from the bath last night and they look better than they ever have before, probably since they were new. In the spirit of the holiday weekend, I included a festive element to the photos.
Saturday, June 21, 2014
Cleaning the Fuel Injectors
After further testing, I've been able to determine that I have 1 stuck injector and 1 partially stuck injector. I took the injector from 1 and swapped it with 3. Then I jumped the RPM relay to run the fuel pump with the air plate fully depressed. Now the #3 line isn't flowing but the #1 line is.This is good news because it means the fuel distributor is good.
I decided I would take all the injectors and put them in a carb+brake cleaner bath for a day or two fully submerged. Then I'll test them again to determine if they need to be replaced.
Friday, June 13, 2014
Fuel Flow Testing Part II
With a new battery installed, I've resumed working on this. I also ordered and connected a Battery Tender brand trickle charger/maintainer. Having a fully charged battery makes all the difference in the world (imagine that).
The flow test seems to have indicated one failed injector and possibly a second. The injector @ the #1 cylinder isn't flowing at all. It drips a little and that's about it. The injector at cylinder #2 is sporadic. It kinda sounds like a faucet with air in the system needing to be purged. I know this isn't the case though as the system is air-tight and there are no leaks anywhere. If any air was trapped in the system, it would be expelled within the first second or two of operating the system.
I'm going to research and see if I can soak these 2 injectors in some sort of a chemical/cleaning bath. If that doesn't correct the issue, I'll have to replace them @ $60 each. It's probably worth a few bucks to try cleaning them first.
Here is a video I took last night illustrating the problem:
The flow test seems to have indicated one failed injector and possibly a second. The injector @ the #1 cylinder isn't flowing at all. It drips a little and that's about it. The injector at cylinder #2 is sporadic. It kinda sounds like a faucet with air in the system needing to be purged. I know this isn't the case though as the system is air-tight and there are no leaks anywhere. If any air was trapped in the system, it would be expelled within the first second or two of operating the system.
I'm going to research and see if I can soak these 2 injectors in some sort of a chemical/cleaning bath. If that doesn't correct the issue, I'll have to replace them @ $60 each. It's probably worth a few bucks to try cleaning them first.
Here is a video I took last night illustrating the problem:
Wednesday, May 28, 2014
Fuel Flow Testing
I started fuel-flow testing last weekend after finishing the last fuel line and checking all lines and connections to make sure they were tight. I charged the battery for several hours on trickle and a couple of hours on the intermediate 10A mode.
I rigged up an RPM relay jumper to manually trigger the fuel pump and pressurize the system. You can see it in the picture below. I used a board and mounted a 2-way toggle switch on it so I could operate it from the back of the car. I found one leak at that compression fitting in my previous post. I tightened it up and got it leak-free as of now. No other leaks were found. Initially the injectors were somewhat flowing ok but the battery just would not take a charge and appears to be dead now. I'm replacing the battery in the next few days so I'll have to wait and finish the flow testing then.
If all goes well I should be able to install the injectors into the cylinder heads with the retaining clips and see if I can get her running. I feel like we're pretty close here barring no major setbacks.
I rigged up an RPM relay jumper to manually trigger the fuel pump and pressurize the system. You can see it in the picture below. I used a board and mounted a 2-way toggle switch on it so I could operate it from the back of the car. I found one leak at that compression fitting in my previous post. I tightened it up and got it leak-free as of now. No other leaks were found. Initially the injectors were somewhat flowing ok but the battery just would not take a charge and appears to be dead now. I'm replacing the battery in the next few days so I'll have to wait and finish the flow testing then.
If all goes well I should be able to install the injectors into the cylinder heads with the retaining clips and see if I can get her running. I feel like we're pretty close here barring no major setbacks.
Wednesday, May 21, 2014
Last Fuel Line Finished
Well after 3 months of a heavy work schedule, I finally made some time today to work on this and get the car a step closer to being back on the road.
I was able to get the final fuel line connected and the compression fitting seems to have worked like a champ. I'll find out for sure when I flow and pressure test everything. I'm charging the battery now so I'm hoping to get to that part this weekend or in the very near future. More to come soon!
Sunday, February 16, 2014
Last Fuel Line Part II
It was 75 degrees and mostly sunny today here in Dallas. I had to take advantage of the first nice weekend since last November.
After struggling and fighting I finally gave in and cut off the line as close as I could to the fitting.
I filed down the rough edge from the hacksaw cut and prepped the end of the line for the new compression fitting. Then I examined my replacement parts and started scratching my head a bit. I'm either not seeing the connection correctly in my head or I'm missing a part. Either way I'm going to contact my parts vendor and see what he says.
After struggling and fighting I finally gave in and cut off the line as close as I could to the fitting.
In the meantime I got the injectors ready for the flow test and installed the "pipe of agony". I also tested the idle speed motor (ISM) and it worked without issue, which is excellent news considering this is a $200+ part if I had to replace it. We're getting closer. I went ahead and stuck the trickle charger on the battery so I can jumper the RPM relay to do the flow test. I'm going to have to wait until I get this last fitting connected though and then go back through and make sure everything is tightened up.
Tuesday, January 21, 2014
Last Fuel Line
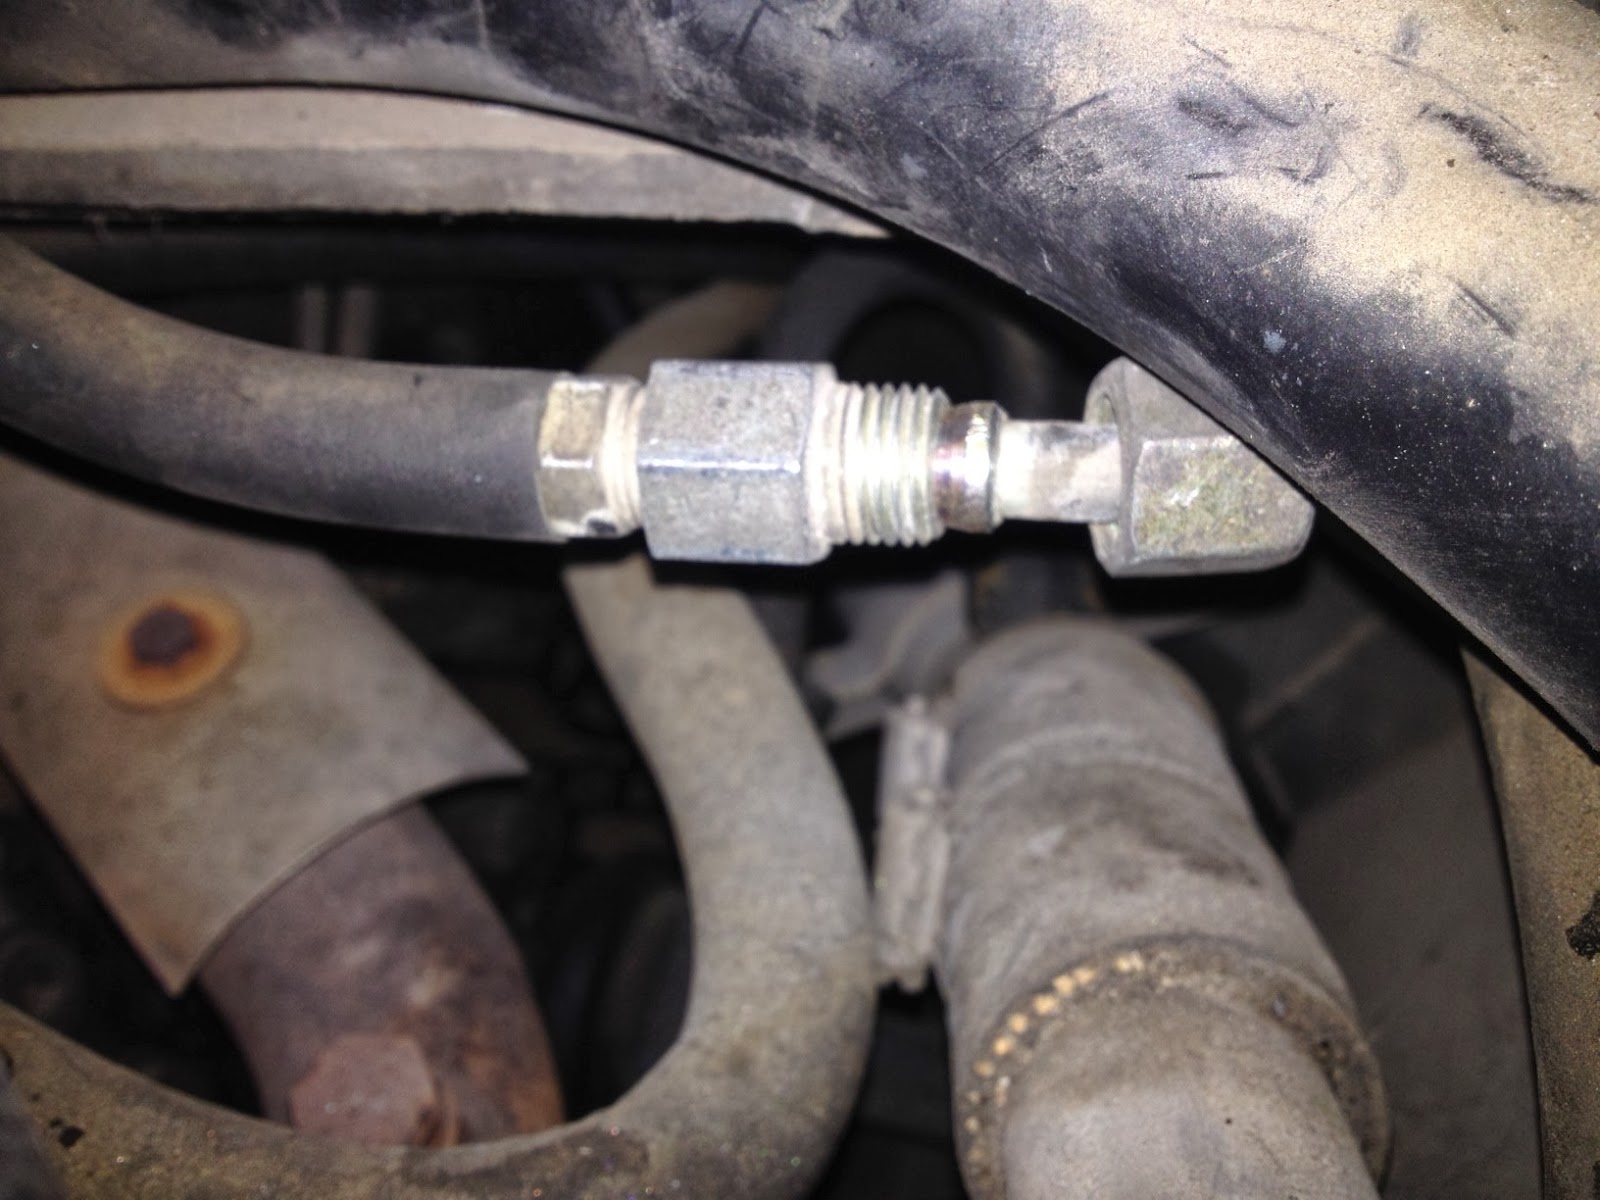
Well I have one last fuel line to replace and connect before I can flow test everything including the injectors. It's the return line that runs from the fuel distributor to the fuel accumulator. There is a soft line that comes off the fuel distributor and connects to a metal hard line by means of a compression fitting.
Last night I was able to remove the soft line by holding a 14mm wrench on the soft line side and a 17mm wrench in the middle. I had already removed the cupped-nut on the far right (orientation relative to the pictures below). So now I have the soft line removed and the far right nut loose. My next step is to figure out how to get the middle section with the 17mm fitting loose, as my replacement parts look to replace this fitting.
Here are the pictures. I'm trying to be as careful as possible so as not to damage the metal line. That would be a royal pain if I had to replace that.
In the picture above, you'll see a 17mm wrench on the middle fitting of the line. It's below the ignition coil and stabilizer bar.
Here is a picture of the same fitting up close. Notice the nut on the far right is loose.
Now the soft line with the 14mm connection has been removed. The middle section with the compression fitting to the hard line is still in tact. It spins freely on the hard line but I cannot get it to pull or push loose.
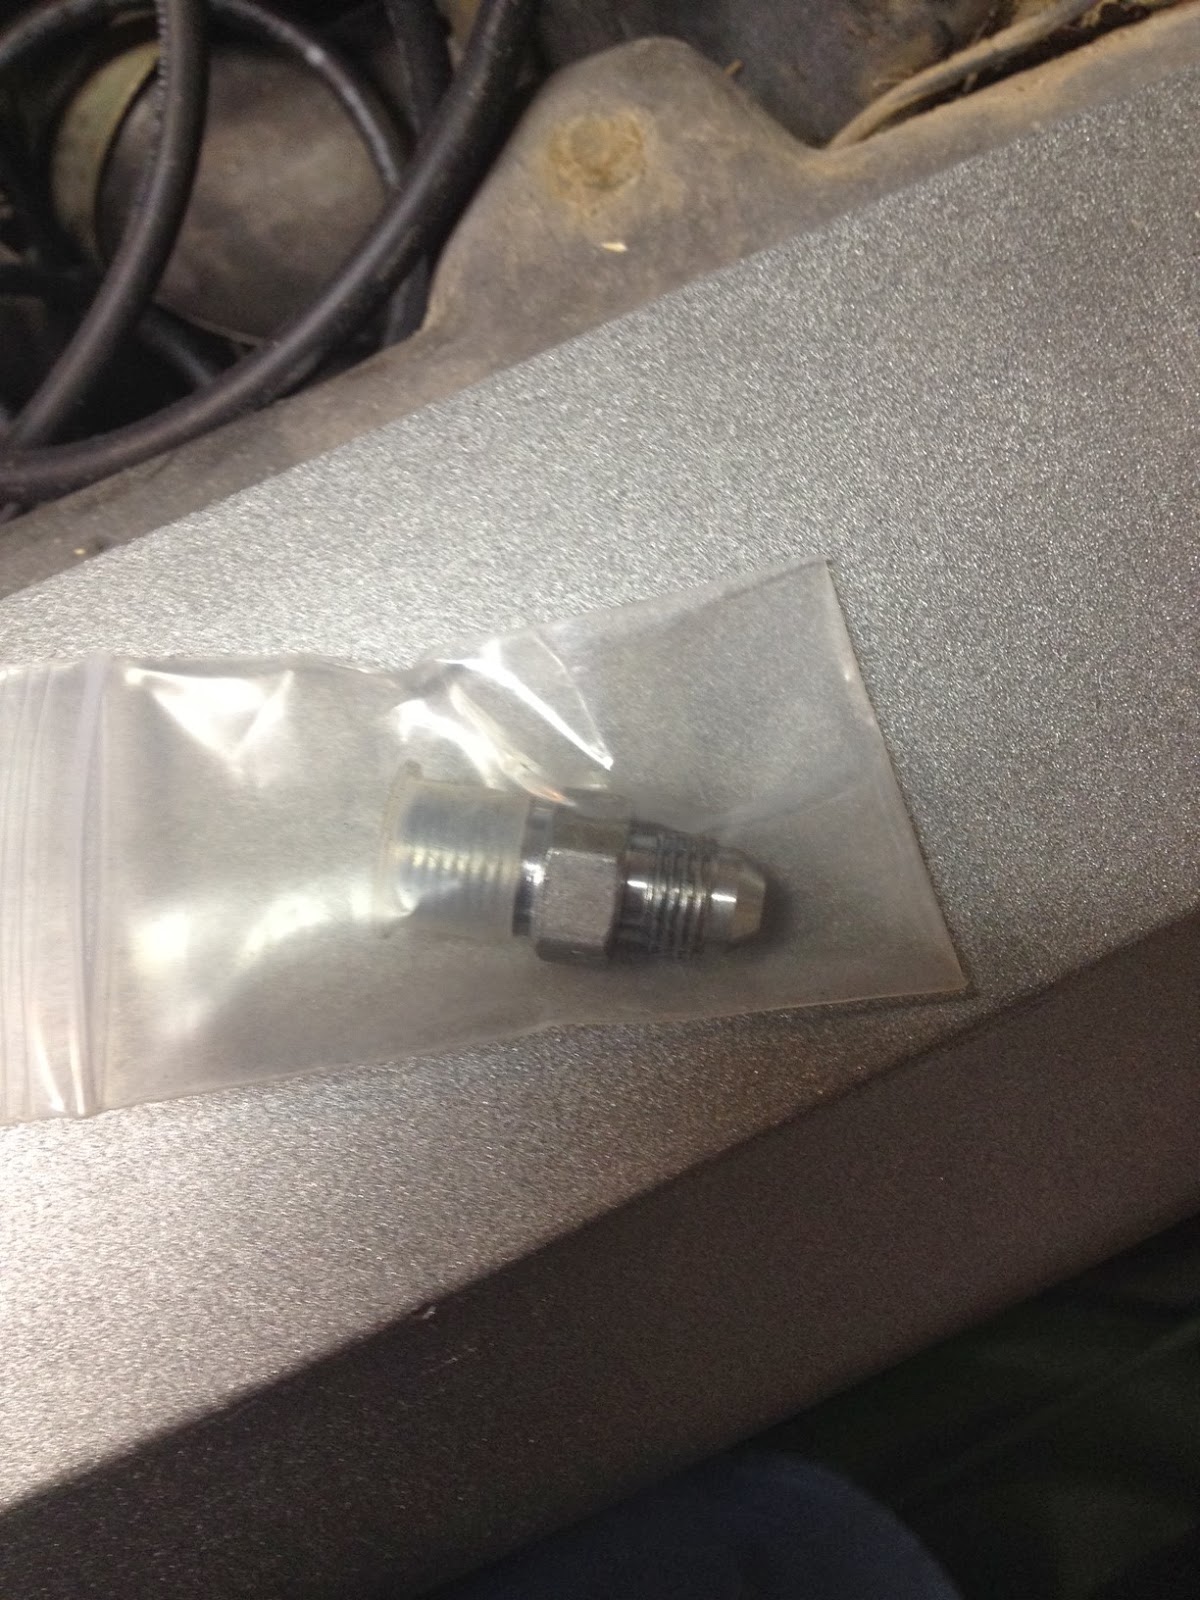
This is a picture of the replacement fitting.
Last night I was able to remove the soft line by holding a 14mm wrench on the soft line side and a 17mm wrench in the middle. I had already removed the cupped-nut on the far right (orientation relative to the pictures below). So now I have the soft line removed and the far right nut loose. My next step is to figure out how to get the middle section with the 17mm fitting loose, as my replacement parts look to replace this fitting.
Here are the pictures. I'm trying to be as careful as possible so as not to damage the metal line. That would be a royal pain if I had to replace that.
In the picture above, you'll see a 17mm wrench on the middle fitting of the line. It's below the ignition coil and stabilizer bar.
Here is a picture of the same fitting up close. Notice the nut on the far right is loose.
Now the soft line with the 14mm connection has been removed. The middle section with the compression fitting to the hard line is still in tact. It spins freely on the hard line but I cannot get it to pull or push loose.
This is a picture of the replacement fitting.
Sunday, January 12, 2014
Fuel Filter Change
As part of my fuel system rebuild, I decided to change the filter itself. Seeing as how I was going to have to remove it anyways to replace the fuel line between it and the fuel distributor, it seemed like a no-brainer. Plus the part was only $12.50.
Unfortunately DMC put the filter in a strange place and so changing it out is kind of a pain. The location is on the inside of the left side of the frame towards the rear of the car not far from the engine compartment. So to change it out you have to lift the car, take off the left rear tire, disconnect the fuel distributor fitting on the top, disconnect the metal hard line elbow fitting at the bottom, and remove 2 nuts and bolts that fasten the filter bracket to the inside of the frame. It wasn't terribly hard to get loose. I did have to tap on the elbow fitting with a hammer and use a little PB Blaster to get the hard line fitting loose. Oh and you better have a bowl handy to catch some gasoline when it breaks loose. Here's a picture of the filter removed.
I reused the bracket, replacing the padding with a new strip, and fastened the fuel line that runs to the distributor on my work bench. After I took this picture I had to loosen it up and re-adjust the positioning of the line relevant to the location of the fuel distributor. Then I tightened it back up.
With that completed, I mounted the new filter on back on the car and connected the hard line at the elbow. The trick here is to use 2 open-ended wrenches against each other and facing straight down. If you try to get on the back of the elbow, you'll bend the bottom of the filter a bit (like I did a little). You can work it back in the other direction to straighten it out best you can but you don't want to weaken the metal too much so be careful.
I used a little bit of Teflon tape where the elbow fits to the filter only. I did this because I noticed old tape on the threads when I removed the elbow from the old filter.
Here's a picture of how high I had to lift the car in order to get access. If you're doing this job with jacks on the ground (like me), make sure you lift the car properly and use jack stands to hold the weight.
Unfortunately DMC put the filter in a strange place and so changing it out is kind of a pain. The location is on the inside of the left side of the frame towards the rear of the car not far from the engine compartment. So to change it out you have to lift the car, take off the left rear tire, disconnect the fuel distributor fitting on the top, disconnect the metal hard line elbow fitting at the bottom, and remove 2 nuts and bolts that fasten the filter bracket to the inside of the frame. It wasn't terribly hard to get loose. I did have to tap on the elbow fitting with a hammer and use a little PB Blaster to get the hard line fitting loose. Oh and you better have a bowl handy to catch some gasoline when it breaks loose. Here's a picture of the filter removed.
I reused the bracket, replacing the padding with a new strip, and fastened the fuel line that runs to the distributor on my work bench. After I took this picture I had to loosen it up and re-adjust the positioning of the line relevant to the location of the fuel distributor. Then I tightened it back up.
With that completed, I mounted the new filter on back on the car and connected the hard line at the elbow. The trick here is to use 2 open-ended wrenches against each other and facing straight down. If you try to get on the back of the elbow, you'll bend the bottom of the filter a bit (like I did a little). You can work it back in the other direction to straighten it out best you can but you don't want to weaken the metal too much so be careful.
I used a little bit of Teflon tape where the elbow fits to the filter only. I did this because I noticed old tape on the threads when I removed the elbow from the old filter.
Here's a picture of how high I had to lift the car in order to get access. If you're doing this job with jacks on the ground (like me), make sure you lift the car properly and use jack stands to hold the weight.
Subscribe to:
Posts (Atom)